
This is the one-time setup inside HubSpot. Do it once and you're done for good: every future event you create in Event Engine flows onto your site and triggers its emails automatically.
It follows on from Setting up Event Engine in HubSpot (Part 1 of 2) (install, connect, and create your first event). If you haven't done that yet, start there.
There are 3 jobs here, and they take about 15 minutes together:
- Brand and publish your emails.
- Turn on the workflow that sends them.
- Build the events page on your website.
Short on time, or not a HubSpot person? Email support@eventenginepro.com and we'll do all of this for you, free of charge. The rest of this guide is for anyone who'd rather do it themselves.
After onboarding, Event Engine shows a "What's next?" checklist. This guide is that checklist, done properly.
Step 1: Brand and publish your emails
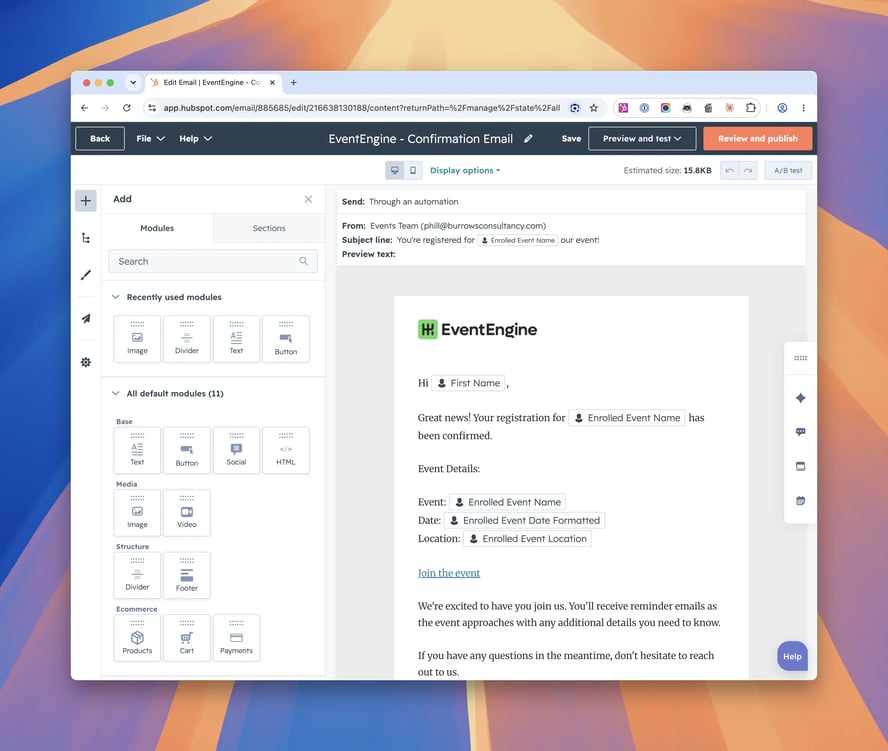
Event Engine installs 8 emails as drafts in Marketing › Email: Confirmation Email, Reminder 1, Reminder 2, Check In Reminder, Thanks For Attending, Sorry You Missed It, Change of Venue, and Event Canceled.
Open every one and do 3 things:
- Swap the logo. They install with a generic Event Engine logo. Replace it with your own so the emails match your brand.
- Edit any wording you want. The body copy is yours to change.
- Publish the email. Drafts don't send. Each one needs publishing.
One rule: leave the dynamic data placeholders alone. Those tokens pull the event details (name, date, time, location, registration info) into each email automatically. Change the text around them as much as you like, but if you edit or delete a placeholder itself, that event detail stops populating.
Step 2: Turn on the workflow
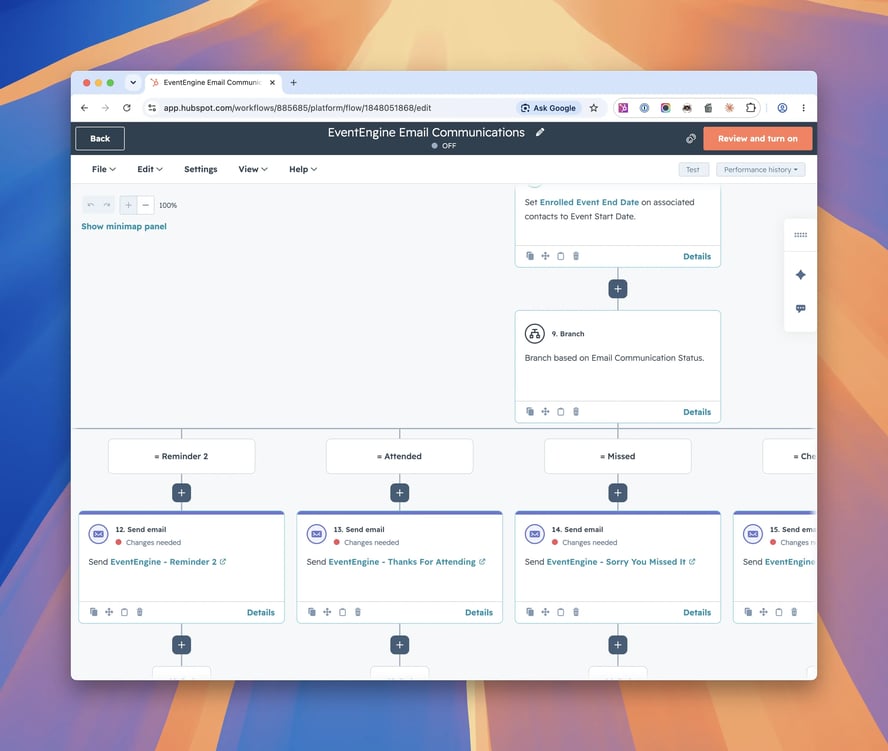
Event Engine installs a workflow called EventEngine Email Communications in Automation › Workflows. This is the engine that sends the confirmation, reminders, and post-event emails at the right time.
It arrives switched Off, and here's the catch: it stays off until the emails from Step 1 are published.
Open it and you'll see each Send email branch flagged "Changes needed" in red. Those branches point at emails that are still drafts. The workflow splits on the contact's status (Attended, Missed, Check-in Reminder, Event Canceled, and so on) and each path sends the matching email.
So the order matters:
- Publish all 8 emails first (Step 1).
- Open each branch's Send email action and re-select the now-published email. The "Changes needed" flag clears as you go.
- Once every branch is clear, click Review and turn on.
Workflow on, emails published: your event communications are now live.
Step 3: Check the marketing event (optional)
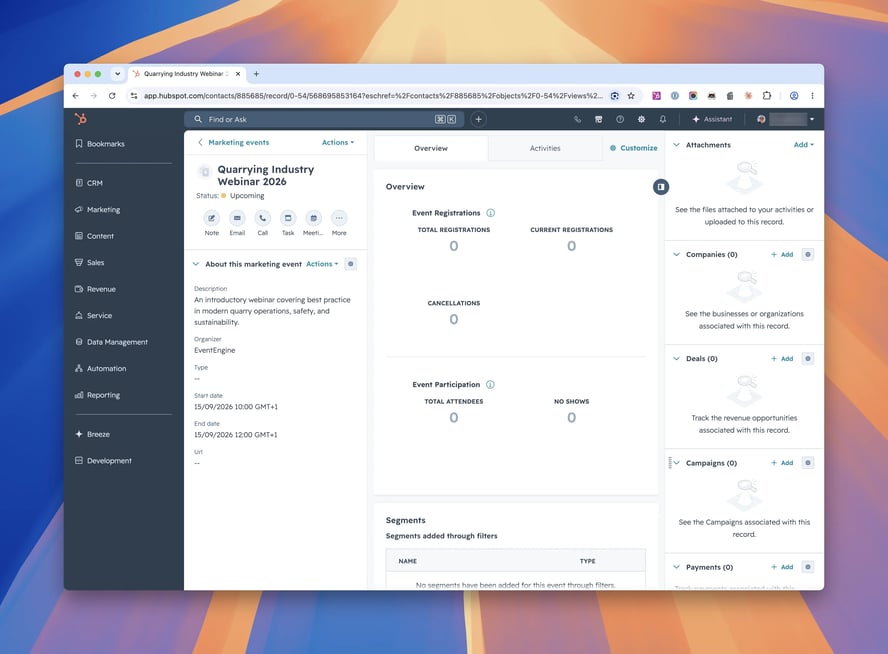
Nothing to do here, but it's worth seeing what happened behind the scenes. The moment you published your event in Part 1, Event Engine created a matching Marketing Event in your HubSpot CRM.
Find it under CRM › Marketing Events. You'll see your event with status Upcoming, organiser EventEngine, the dates you set, and registration and attendance counters sitting at 0. As people register, the counters fill in and every registration ties back to a contact.
Step 4: Build your events page
This is the page your visitors actually see. You build one page holding both Event Engine modules, then point it at the Event Engine data so it can show the full listing and give each event its own detail page.
-
In HubSpot go to Content › Website Pages and click Create a website page.
-
Pick a template (any drag-and-drop template from your theme works), then Edit manually.
-
Add a section, open the module panel (the + on the left) and search event.
-
Drag in both modules, one below the other:
-
EventEngine Listing: the calendar, grid or list of all your events, with filters and search.
-
EventEngine Single: the individual event detail view, with the registration form.
-
-
Set a page title and a clean URL slug in Settings › General.
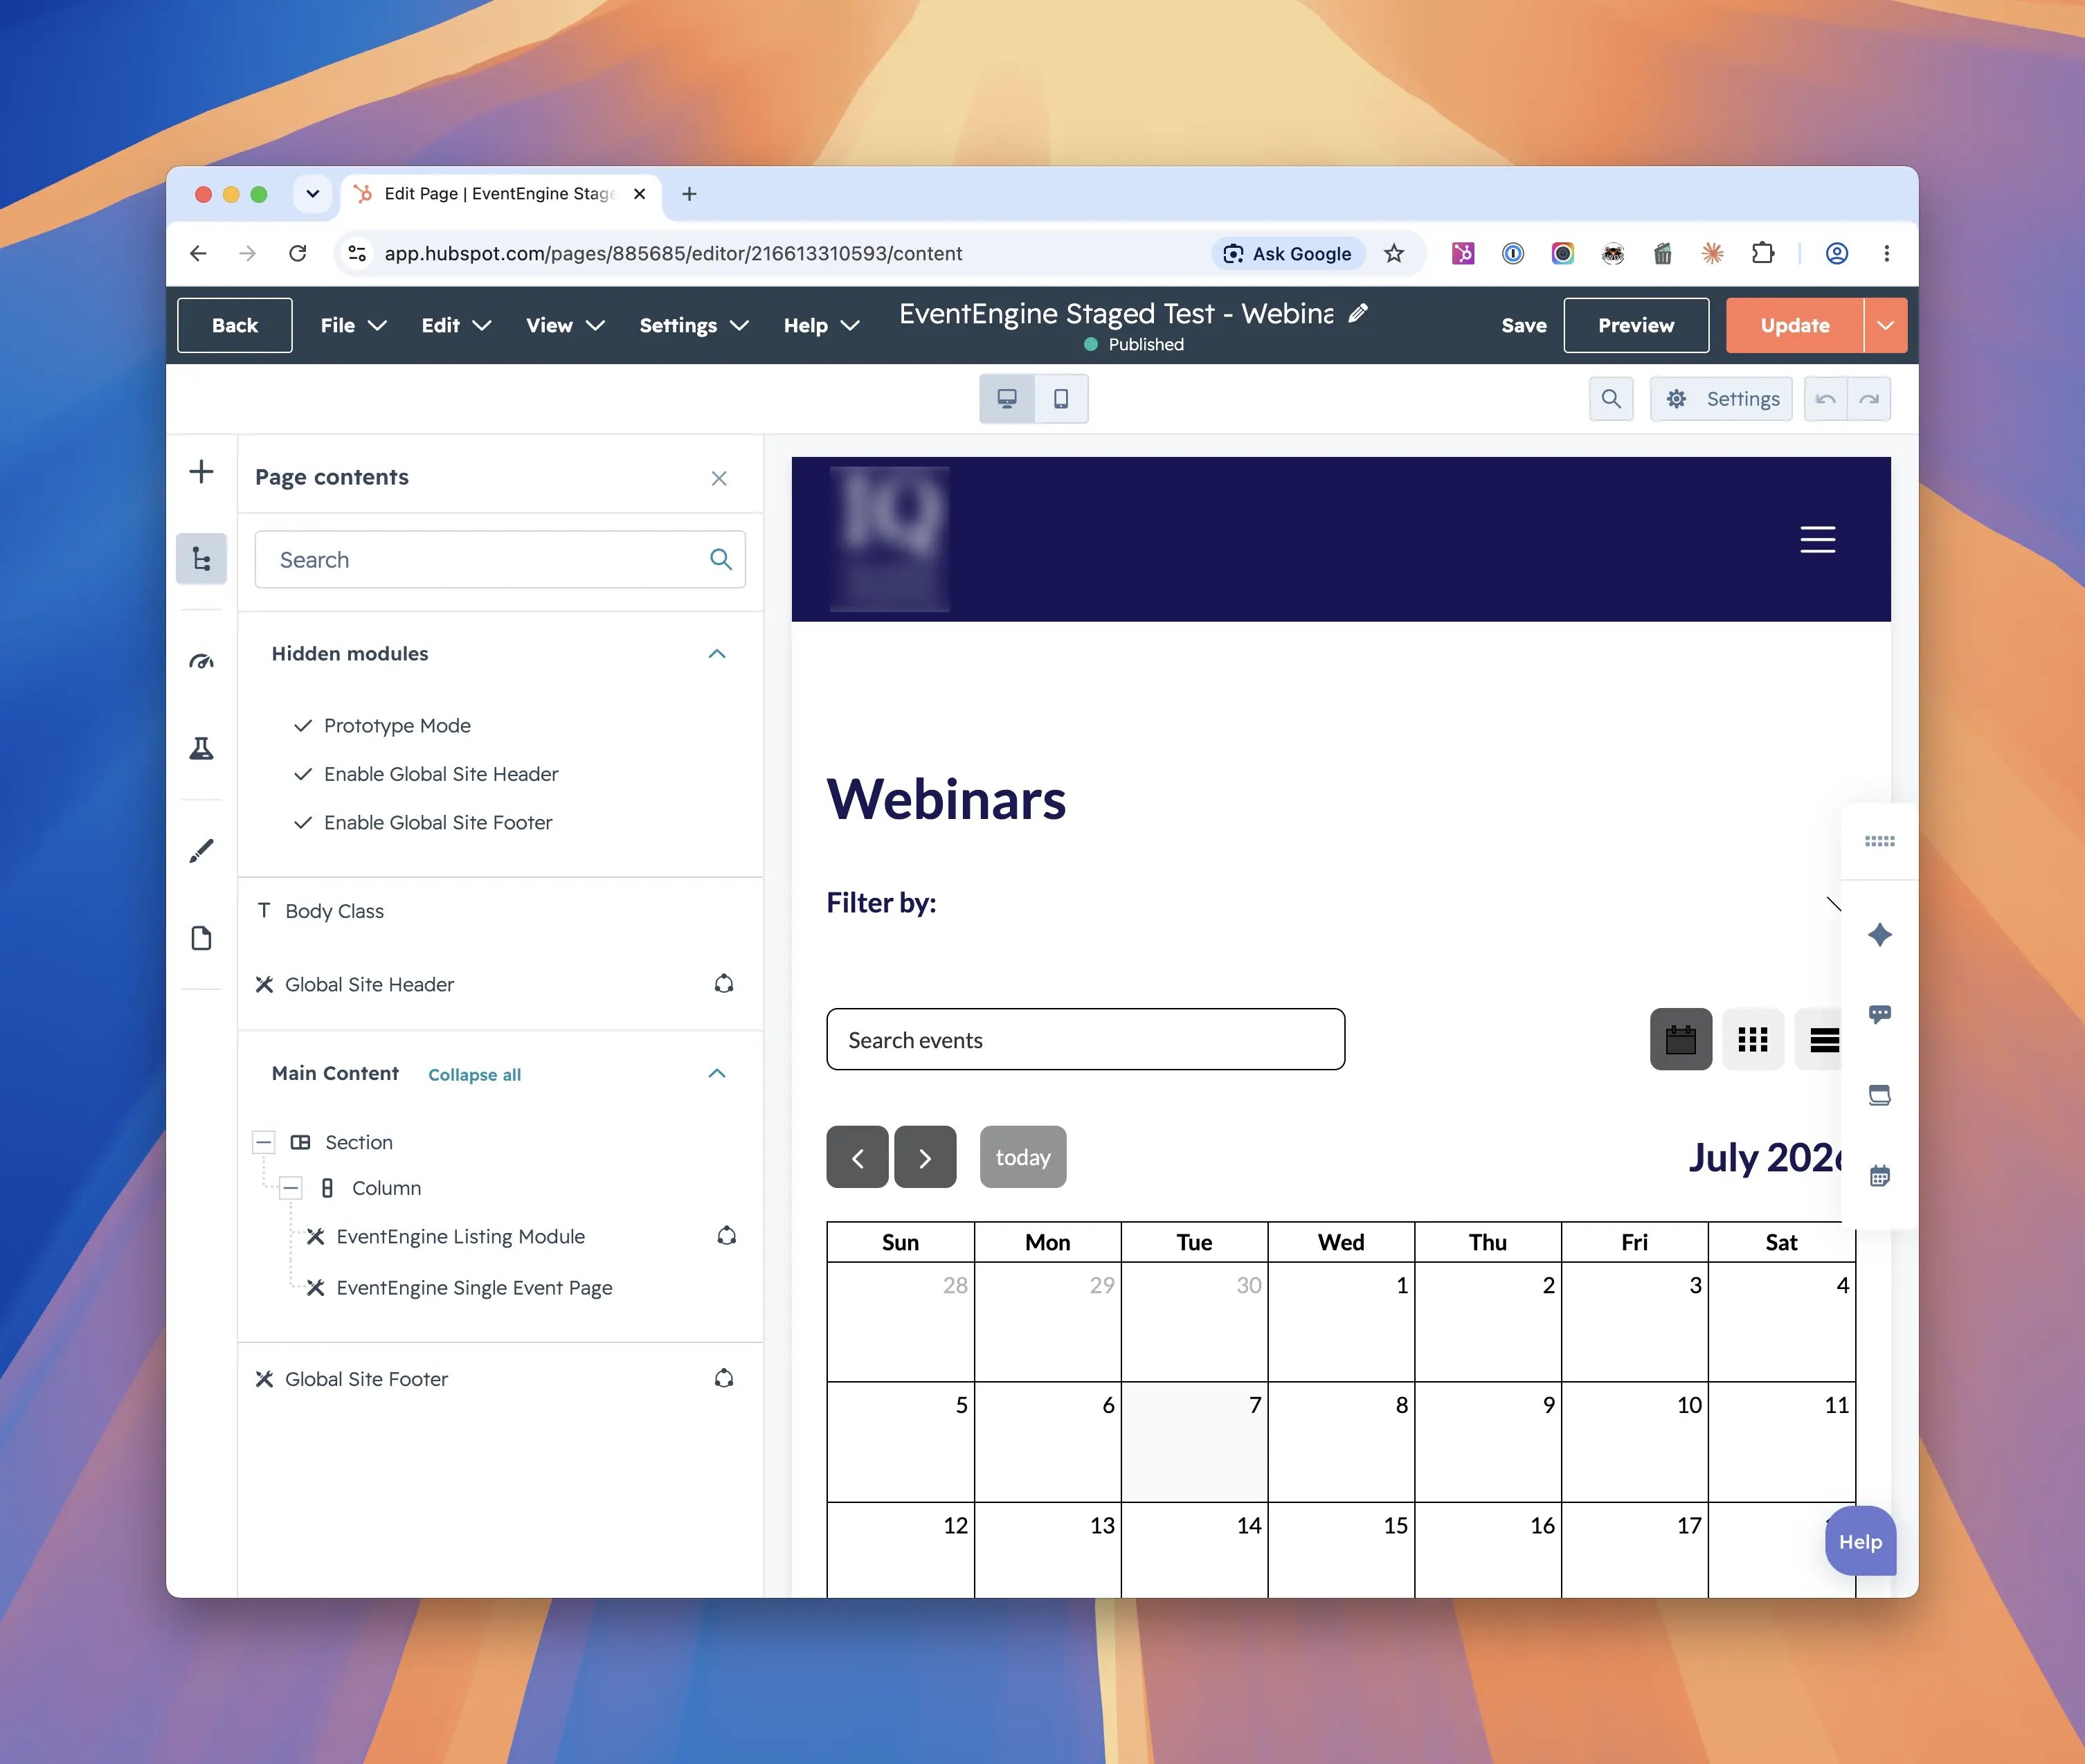
Now the step that's easy to miss. Go to Settings › Advanced › Dynamic pages and set the Data source to EventEngine Pages.
This one setting is what makes the individual event pages work. The listing links each event to a child URL like /your-events-page/your-event-name. Without the data source set, every one of those links returns a 404. With it set, the Single module renders the right event at each URL.
Click Publish (or Update if the page is already live).
You're live
Open your new page on your live site and check 2 things:
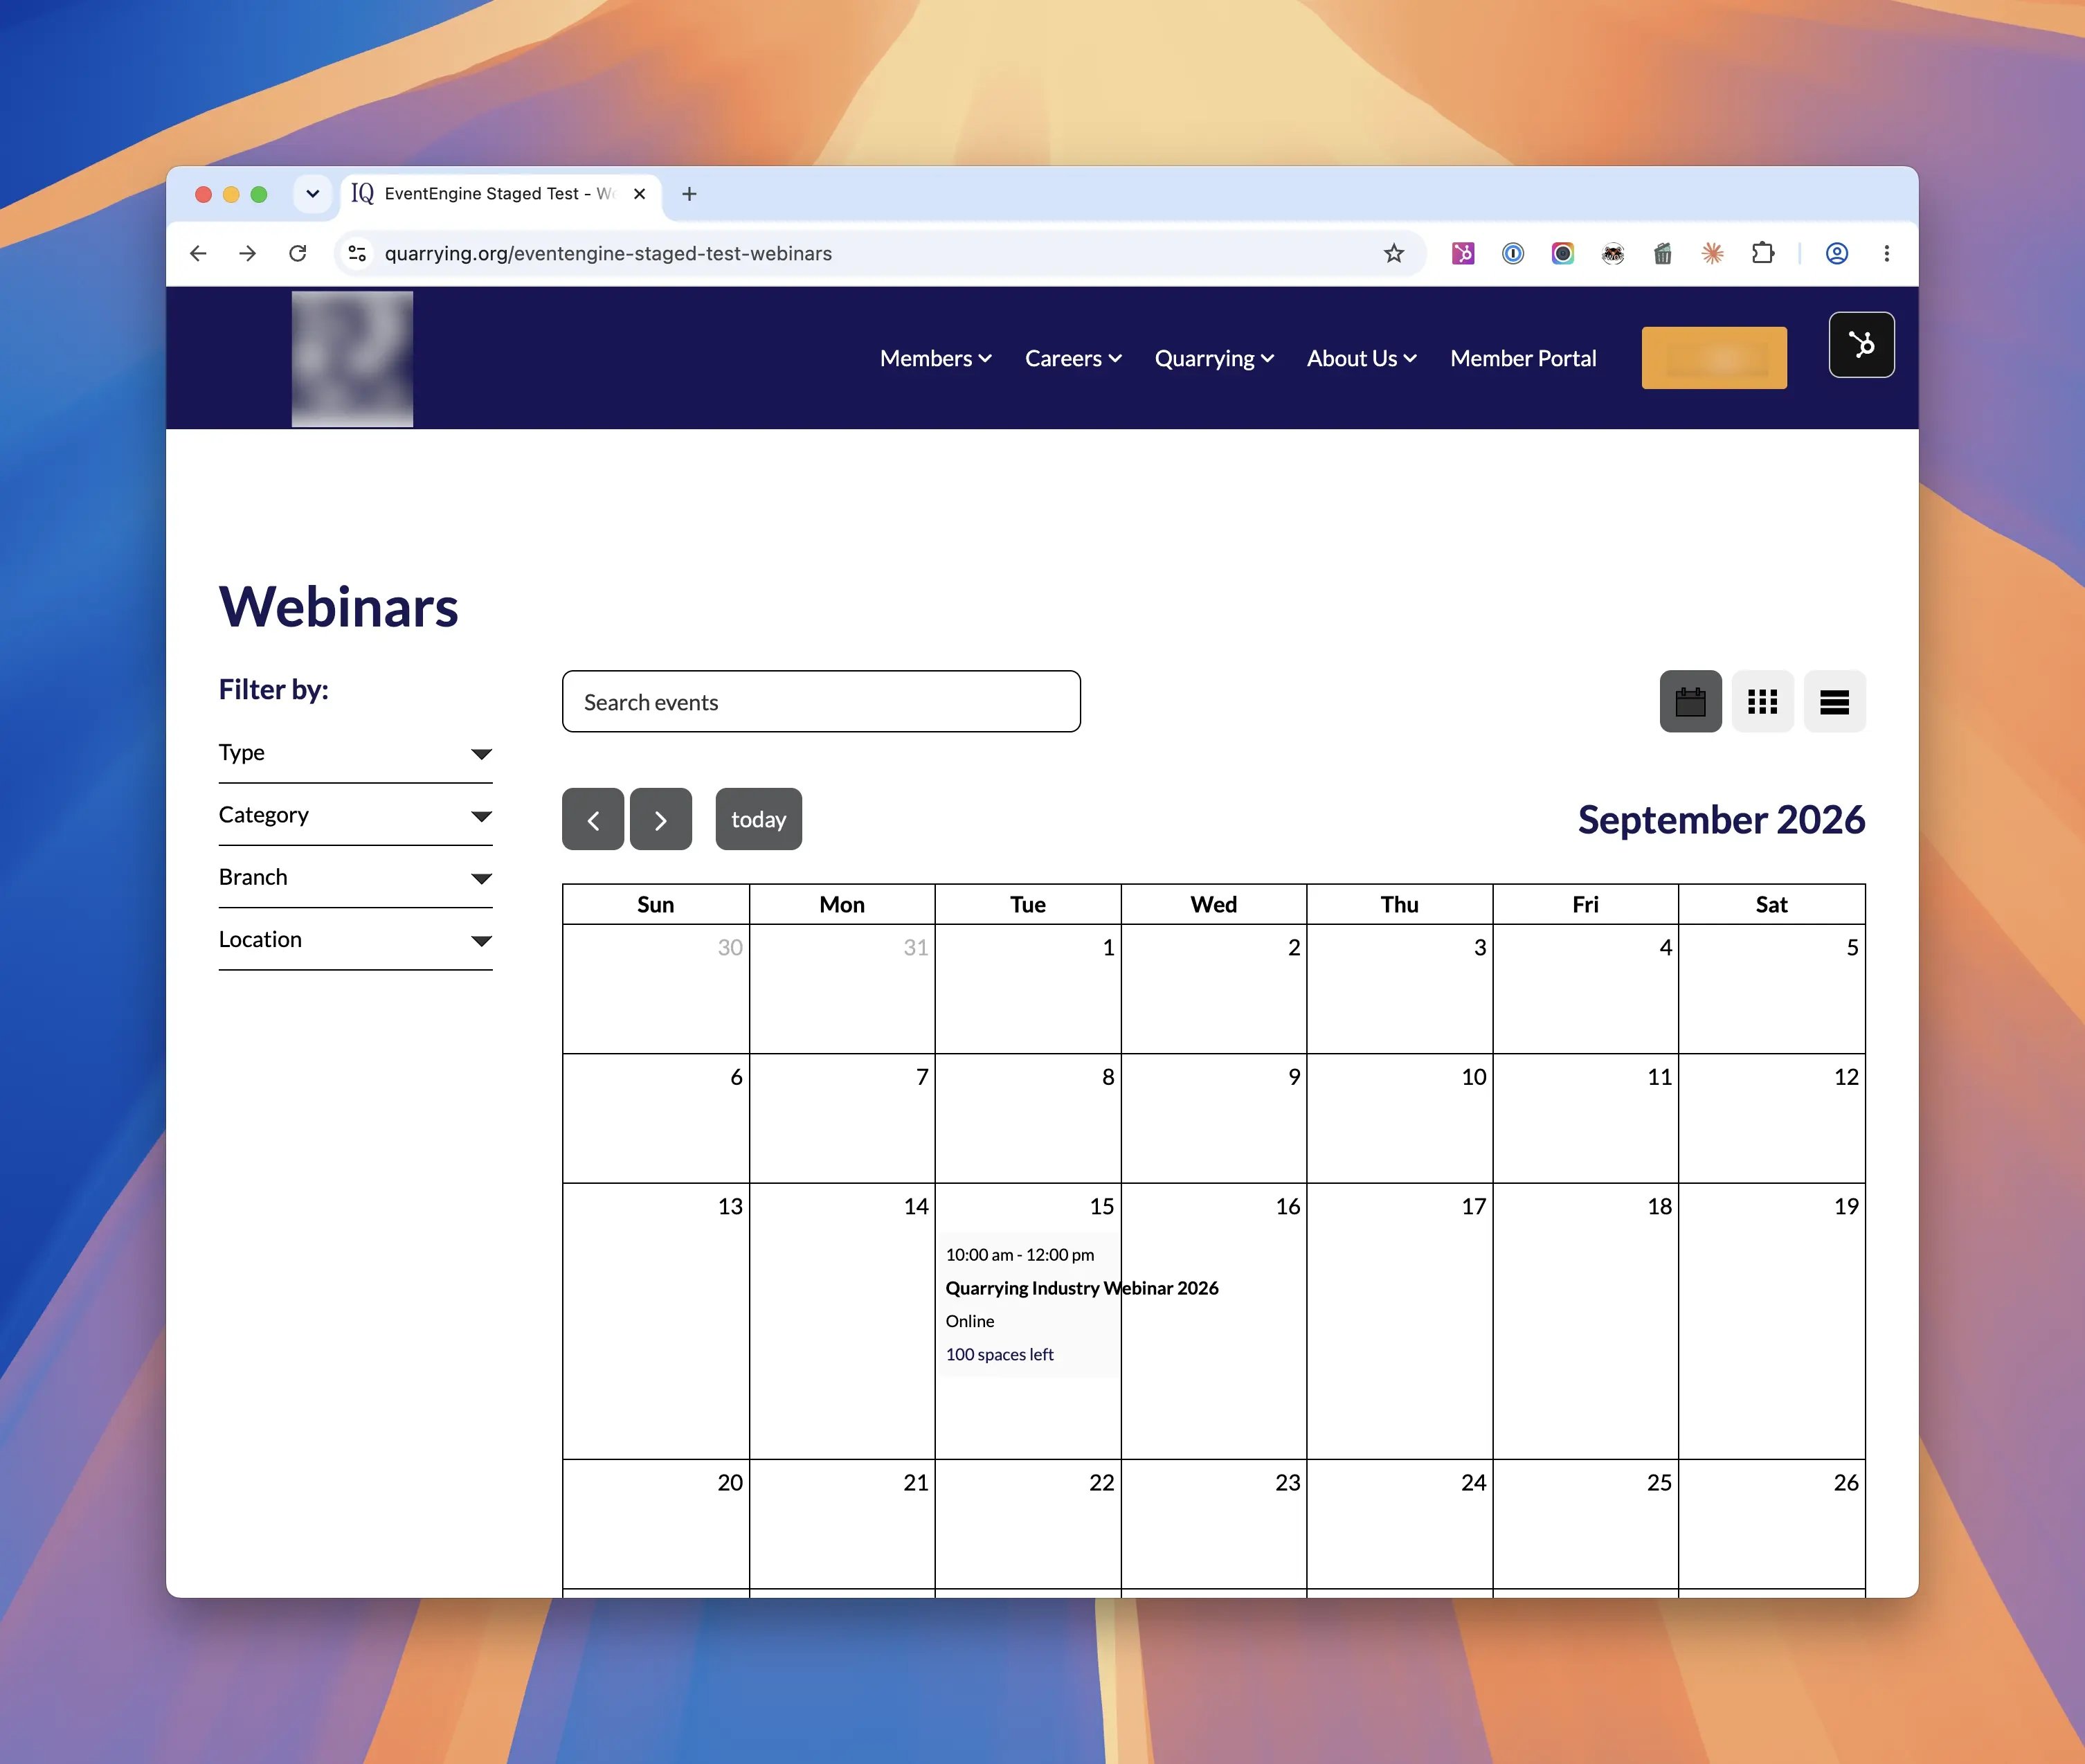
- The listing shows your event, with its name, date, category and type. If the calendar is sitting on a month with no events, switch to list view.
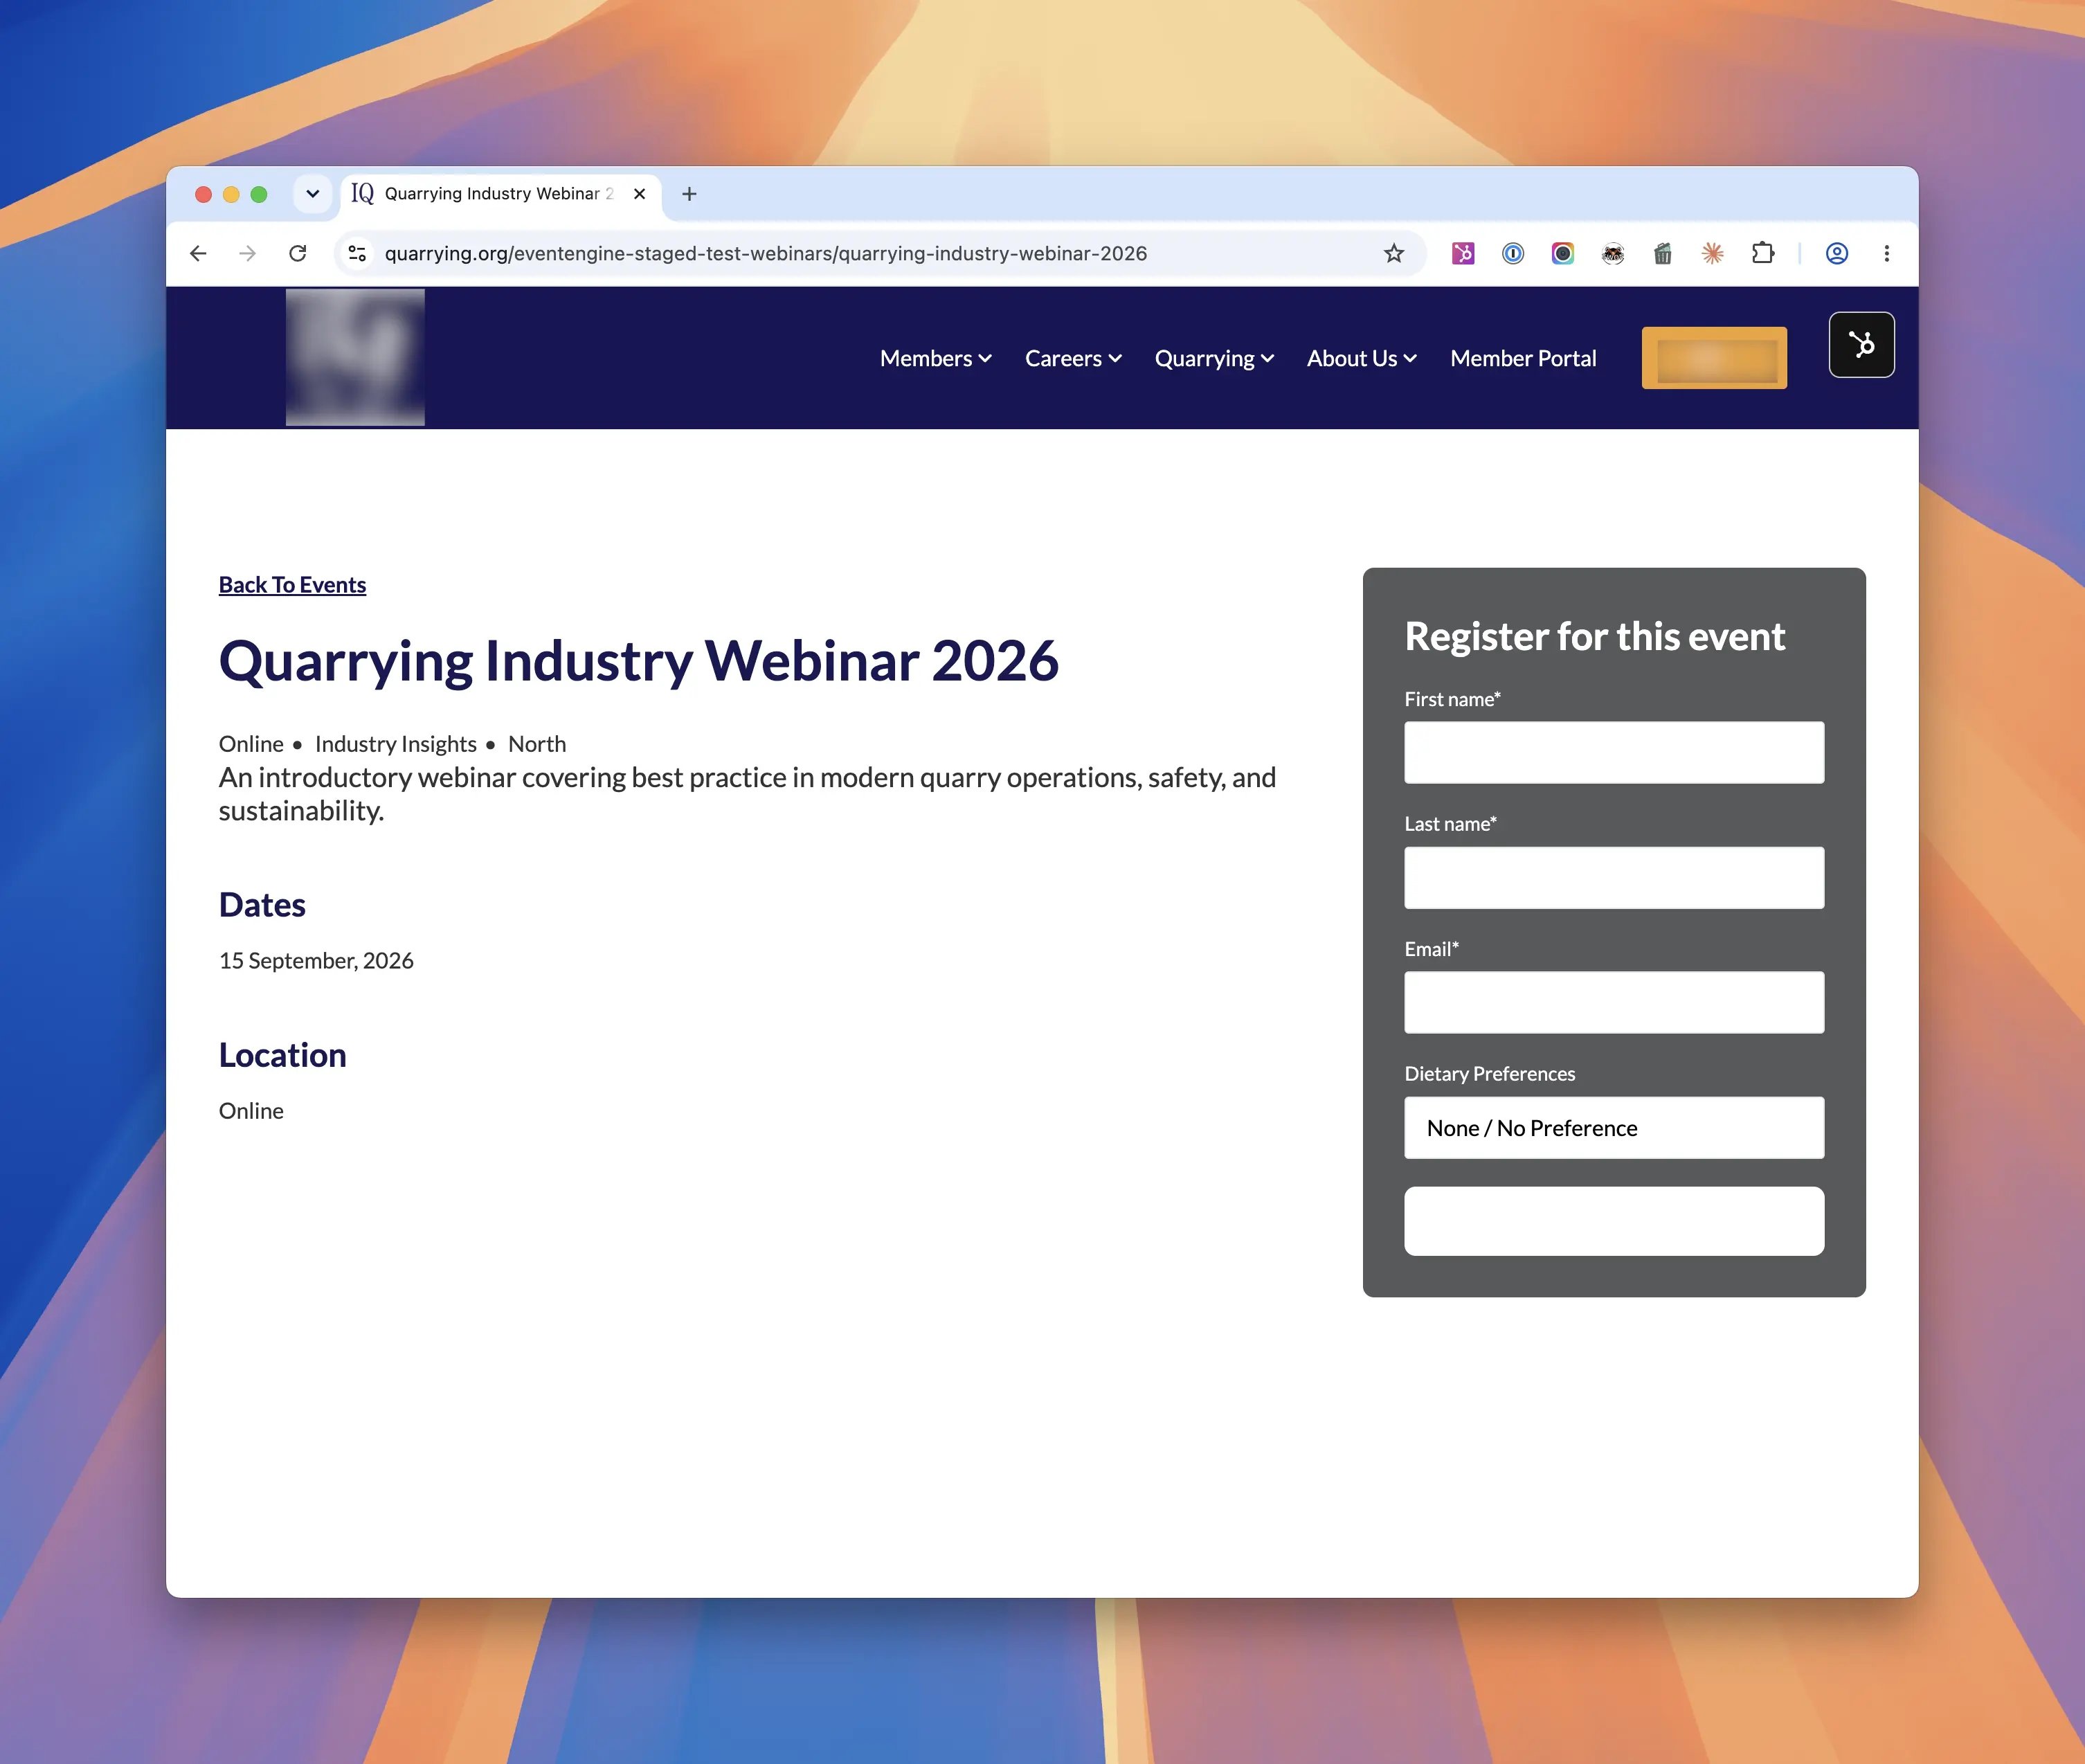
- Clicking the event opens its detail page at its own URL, with the full event info and a working "Register for this event" form.
That's everything. From now on you just click Create event in Event Engine, publish, and it lands on this page and triggers its emails automatically. This HubSpot setup never needs touching again.
Quick troubleshooting (this part)
- The workflow won't turn on. Publish all 8 emails first, then re-select each published email inside the workflow's Send email branches so the "Changes needed" flags clear.
- Event detail pages return a 404. The dynamic page source isn't set. On your events page, go to Settings › Advanced › Dynamic pages, set the Data source to EventEngine Pages, and republish. Both modules need to live on that same page.
- The listing shows but looks empty. The calendar might be on a month with no events. Switch to list view (the list icon, top right of the listing) to see everything upcoming.
- The post-event email picked the wrong version. It decides between "Thanks For Attending" and "Sorry You Missed It" based on your attended and missed lists in HubSpot. Upload those before the email is due to send.
Prefer we set it up for you?
If any of this feels like a lot, don't worry, we have you covered. Please email support@eventenginepro.com and we'll handle the branding, installation, and configuration for you, so you don't have to touch a thing. We do this free of charge. Just drop us a line to ask.